
Insight Blog
Agility’s perspectives on transforming the employee's experience throughout remote transformation using connected enterprise tools.
42 minutes reading time
(8483 words)
From Image to 3D Model With Easy - A Step-by-Step AI Complete Guide

From Image to 3D Model With Easy - A Step-by-Step AI Complete Guide
Go from image to 3D model with AI. Learn how to prepare a photo or sketch, generate your model, fix common flaws and export it in the right format.
From Image to 3D Model With Easy - A Step-by-Step AI Complete Guide

Have you ever wished you could grab a product photo and turn it around to see the back?
An image to 3D model workflow lets you start with a photo or sketch and use AI to create something you can rotate and inspect.
The first draft might look great head-on, but give it a spin and you might spot a wonky handle or a texture that stretches across the sides.
72 percent
of surveyed furniture shoppers said they wanted to use 3D
visualisation whenever they shopped for furniture
A 3D preview lets shoppers inspect angles a product photo might miss. Before publishing one, try it on a phone and check that the details shoppers need to see are easy to find as they rotate the model.
The 2024 study asked 400 qualified respondents about 3D visualisation and configuration for furniture shopping. The figure measures stated interest in that setting.
That extra view can matter to shoppers, too. In a 2024 survey of 400 furniture shoppers, 72% said they wanted to use 3D visualisation whenever they shopped for furniture.
We'll take one product photo through the whole process so you can see how to:
- Pick a clear reference image and decide when you need a few more angles.
- Generate a first draft and catch flaws you'd miss looking straight at it.
- Choose the right file format for a web preview, further editing or 3D printing.
- Share the approved model so everyone on your team knows which file to use.
Stick around for the checklist at the end.
It'll help you make the call that matters before you export: is this model ready to use, or does it need one more pass?
Key Takeaways
- Start with a sharp, evenly lit photo. A three-quarter view gives the AI a look at the front and one side of the object.
- AI estimates hidden surfaces from a single image. If details on the back or sides matter, add reference photos from those angles when your tool supports them.
- Rotate the first draft and compare it with your reference photos. Look for warped shapes, missing gaps and stretched textures before you export.
- Choose a format your destination app supports. GLB suits many web viewers, while STL or 3MF can be used for 3D printing after checking the scale, mesh and sliced layers.
- Test the exported file where it will be used, then share the approved version alongside the reference photos and a preview.
How does AI turn an image into a 3D model?
Lets take a photo of a mug with its handle pointing towards the camera.
You can see the front clearly, but the back is hidden. To turn that image into a 3D model, AI uses clues like the outline, shading and visible details, then draws on patterns it learned from other examples to fill in the missing parts.
The result can look convincing from the front and still have a warped handle or a lopsided back when you rotate it.
It's a similar idea to AI image generation. An image generator uses learned patterns to create pixels. An image-to-3D tool also has to work out the shape of surfaces the camera never saw. That's why it's worth checking your model from the back, sides and underneath before you export it.
If you're starting with one photo, try a slightly angled shot that shows the front and one side. Use even lighting and a plain background so the object's edges are easy to see.
If your tool supports multiple images, add photos of the same object from the back and both sides.
Those extra views are especially helpful when the object is asymmetrical or has details, like a clasp or a connector, that only show up from certain angles.
Can You Turn a Single Image Into a 3D Model?
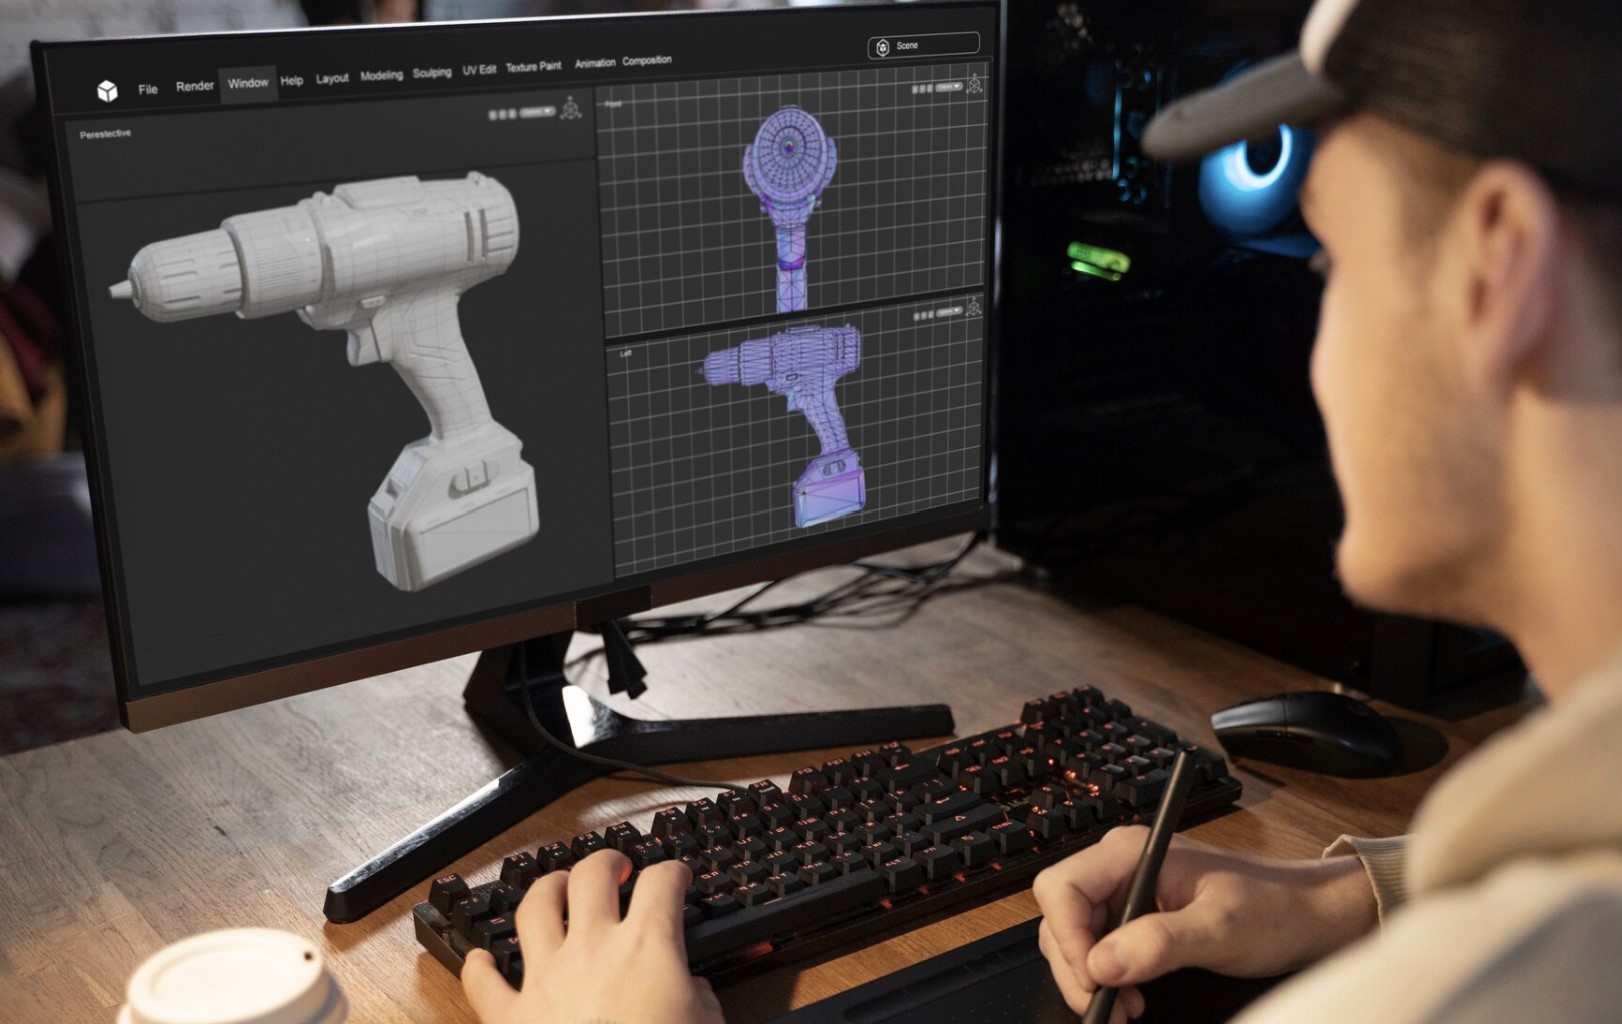
Can You Turn a Single Image Into a 3D Model
Yes. An image to 3D model workflow can start with one clear photo or sketch.
AI uses the outline, shading and visible details to estimate the object's shape, then fills in the parts it can't see. That's why a model can look right from the front but have a handle that's too thick or a back panel that looks nothing like the real thing.
How many photos you need depends on the object and what you plan to do with the model:
- A simple bottle for a concept mock-up. One slightly angled photo may be enough to capture the basic shape. If the back label matters, include a separate shot of it.
- A chair for a product page. Add side and rear views so the tool has a reference for the angle of the legs and the shape of the backrest. Those details are easy to miss in a front-facing photo.
- A headset with controls on one side. Include a close-up of the buttons and charging port. Small features can disappear or blend into the model if they're hard to see in the main image.
If your tool accepts multiple images, photograph the same object from different angles under even lighting. Keep the whole object in frame for the main shots, then add close-ups for details you want to check.
If you only have one image, start with a three-quarter view so the AI can see the front and one side.
Your team might start by searching for "AI 3D model generator free" to try a first draft. Before sharing the result, agree on who'll review it, where feedback goes and which version is approved.
A note like "the rear legs are too straight compared with the side photo" gives the next person a specific fix they can make without another meeting.
What Can You Use an AI-Generated 3D Model For?
Once you've decided which photos to use, think about where the finished model needs to go.
A chair model might look great in a still image, but the same model could show warped legs when a shopper rotates it or need repairs before it can be 3D printed.
Knowing the intended use upfront helps you decide what to check and how much cleanup to plan for.
| Use case | What to check before you use it |
| Concept mock-ups, still renders and product visuals | Start with the camera angle you'll use. A rough patch underneath may never show in a still render, but a warped armrest will stand out in a close-up. |
| Website 3D viewers and augmented reality (AR) | Rotate the model in the actual viewer to catch flaws from every angle. Check that the file loads smoothly, and verify its scale if people will place it in a room using AR. |
| Games and animation | Test the model in the target engine or editor. You may need to rebuild parts of the mesh, adjust how textures wrap around it or add a rig so it moves as intended. |
| 3D printing | Open the file in your slicer and preview the layers. Check the dimensions, repair holes in the mesh and look for sections that are too thin to print reliably. |
| Precision CAD and manufacturing | Use the generated model as a visual reference. Build the production model from verified dimensions and tolerances. |
Before you start the image to 3D model workflow, write down what the finished asset needs to do. For a still render, that might mean looking convincing from one angle.
For an interactive product view, it means holding up from every angle and loading smoothly.
That gives everyone reviewing the model a clear way to tell when it's ready.
How to Convert an Image to a 3D Model Using AI
Let's say your ecommerce team has a photo of a ceramic mug and wants shoppers to be able to spin it around on the product page.
The image to 3D model workflow starts with that photo and ends with a file you've tested in the actual product viewer. In between, you'll check whether the AI got the details right, especially the handle, rim and underside.
There's a reason to think about how people will interact with the finished model.
In a 2024 survey of 400 furniture shoppers, 72% said they wanted to use 3D visualisation whenever they shopped for furniture. That's one example of where interactive views can serve a clear purpose.
1. Decide What the 3D Model Is For
So the first thing you want to start with, is a one-sentence brief everyone can work from.
For the mug, that might be: "Create a model shoppers can rotate on the product page. Match the blue glaze, keep the handle opening clear and preserve the shape of the rim."
First approval gate — approve the visual source or concept direction. If you're modelling an existing product, ask the product owner to confirm the reference shows the right item and colour. If you're working from an idea, agree on the shape, materials and style before generating the first draft.
Tool to use — A shared brief or project board where the reviewer can approve the reference and record what the model needs to get right.
2. Prepare a Clear Reference Image
The nest thing for the mug, take a three-quarter photo that shows the front, part of the side and the opening inside the handle.
Use even lighting and a plain background. Keep the entire mug in frame so the tool has a clear outline to work from.
If the handle attachment or the underside needs to match the real product, take extra photos of those areas. For a multi-view workflow, use the same mug and consistent lighting across all shots. Label each view so it's easy to upload and compare later.
Tools to use — A phone camera and a basic photo editor for cropping or adjusting exposure. Keep the original photo handy so reviewers can compare the generated colour and shape against it.
3. Generate Your First 3D Model
Choose the input that matches what you have.
Text to 3D, Image to 3D and Multi-view to 3D are optional paths.
Pick one to start, then switch if the first result needs a better reference. Available modes and accepted inputs vary by tool.
| Generation path | When to use it | Mug example |
| Text to 3D | You have an approved concept and need a first visual. | Describe a short ceramic mug with a rounded handle and a matte blue glaze. |
| Image to 3D | You have one clear photo and want a first model based on it. | Upload the approved three-quarter photo and check how well the first draft captures the silhouette. |
| Multi-view to 3D | You have several photos of the same object and details on multiple sides matter. | Add a side or rear view so the tool can see more of the handle and where it joins the mug. |
For this example, start with Image to 3D.
Upload the photo, generate a draft and label it mug-v01. Save the source image alongside it.
If the handle looks wrong, you can compare the draft with the reference before deciding whether to regenerate with more views or edit the mesh.
Tool to use — An AI 3D model generator that accepts your chosen input and supports the export format you need.
4. Inspect and Refine the Result
Open the draft in a 3D viewer and rotate it slowly.
Check it from the back, from above and underneath.
For the mug, look at three things first:
- Handle: Is the opening clear? Does the handle join the mug in the right places?
- Rim and interior: Is the rim round and even? Can you see into the mug when you tilt it?
- Shape and colour: Does the silhouette match the photo? Does the blue glaze look consistent as you rotate the model?
If the handle opening is filled in, try regenerating with a clearer side view. If the shape is close and there's a small bump on the base, use a mesh editor to clean up that area.
When you ask for a second review, give the reviewer something specific to check, such as "Compare the handle opening in mug-v02 with the side photo."
Tools to use — A 3D viewer for inspection and a mesh editor for local fixes to the model's shape or surface.
5. Export and Test the File
For the mug's web preview, export as GLB if your product viewer supports it. GLB packages a 3D asset into a single binary file and is designed for delivery to applications and viewers.
Open the exported file in the same viewer shoppers will use.
Try it on a phone, give it a full spin and check that the textures load, the mug faces the right way and the handle still looks right. If the file is slow to load, check whether you can simplify the mesh or reduce texture size while keeping the details shoppers need to see.
Tools to use — Your target web viewer, a mobile browser and a shared folder for the final handoff.
Put the approved export, reference photo and a preview in the same place so the person publishing the product page can tell which version to use.
How to Get a Usable 3D Model
How to Get a Usable 3D Model
A model can look great when you rotate it on screen and still need work before you can print or animate it.
In an image to 3D model workflow, knowing where the asset will end up helps you decide what to fix and when to stop.
- For 3D printing, prioritise a closed, watertight mesh. Open it in your slicer and check for gaps or sections that are too thin to print reliably.
- For games or animation, plan time to clean up the mesh. If the asset needs to bend or move, check how it deforms after rigging. A rigid prop may only need a simpler mesh and an import check in the game engine.
- For still renders or product visuals, focus on what the viewer will see. The first draft may be usable if the shape, colour and texture look right from the intended camera angles.
If the first draft gets a detail wrong, try adding a photo that shows it clearly before spending time fixing the mesh.
With the mug from the walkthrough, a side photo can show the shape of the handle opening, while a rear photo can show where the handle joins the body.
The same idea applies to a chair with an offset armrest or a tool with controls on one side. If your generator supports multiple views, choose angles that reveal details missing from the original photo.
How to Compare AI Image-to-3D Tools
Two tools can turn the same photo into models that look almost identical from the front.
Rotate them, though, and you might see that one has kept the mug's handle open while the other has filled it in. That's why it pays to compare the actual exports before you choose a tool for your image to 3D model workflow.
Start with the same three-quarter mug photo in each tool.
Use single-image mode and choose comparable quality settings where available.
Export in the same format if both tools support it, then open the files in the viewer, editor or slicer you'll actually use. If you want to see whether extra angles help, run a separate multi-view comparison using the same set of photos for each tool.
64
new viewpoints used to assess 3D reconstructions in a 2024 benchmark
For a quick check of your own model, set aside a side or rear photo before you generate it. Then rotate the finished model to that angle and compare the two. With the mug example, this is where a warped base or a filled-in handle can become obvious.
The benchmark compared reconstruction quality across 100 scanned objects using viewpoints outside the input set. The 64 views were used for evaluation.
Source · ECCV 2024, sparse-view reconstruction benchmark, Table 1
|
|
||
| Shape accuracy | Does the mug's silhouette match the reference? Check the rim, handle opening and where the handle joins the body. | ||
| Texture quality | Does the blue glaze stay consistent as you rotate the mug? Look for stretched textures or seams near the handle and base. | ||
| Hidden surfaces | Compare the back and underside against reference photos. If you're testing single-image mode, keep those photos aside for review. | ||
| Mesh quality | Look for holes, stray geometry or fused parts. Note which issues you'd need to fix before using the model. | ||
| Time to a usable export | Track generation and cleanup separately. A draft that appears quickly can still take longer to get ready for the product page. | ||
| Fit for the final use | For the mug's product page, check load time and rotation on a phone. For a print, check dimensions and preview the layers in your slicer. |
For the mug example, imagine one export has a slightly rough base but a clean handle and loads smoothly on mobile.
Another looks sharper in the preview but has a filled-in handle.
If shoppers need to rotate the mug on the product page, the first export is the better starting point. Use the brief you agreed on at the start to make that call.
Why Do AI-Generated 3D Models Look Wrong?
Your AI-generated mug looks right from the front. Then you rotate it and find that the handle is filled in, the back is warped or the blue glaze has turned into a streak.
These flaws can come from details the AI couldn't see clearly in the source photo, or from how it applied the image to the model's surface.
Before you start over, work out whether you're looking at a shape problem or a texture problem. If the handle opening is blocked even when you switch off the textures in your 3D editor, the shape itself needs attention.
If the handle looks right in that view and the streak only appears when the texture is visible, focus on the surface.
| What looks wrong | What to try |
| The back looks warped. The mug looks round from the front but flat or lopsided from behind. | Compare it with a rear photo. If your tool supports multiple views, regenerate using the original photo plus a clear rear or side view. |
| A thin detail is missing or fused. The handle opening is filled in, or the rim blends into the inside of the mug. | Try a side photo that clearly shows the gap or an overhead shot that shows the rim. If the rest of the shape is accurate, fix the affected area in a mesh editor. |
| The texture looks stretched. The glaze looks fine head-on but smears around the handle or base. | Inspect the area with textures off first. If the shape looks right, try reapplying the texture or adjusting how it wraps around the surface. If the source photo has a strong reflection, try a new shot in softer light. |
In an image to 3D model workflow, the best next step depends on where the flaw starts.
If the source photo hides a feature the final model needs, give the AI a clearer view.
If the draft has one local defect and everything around it looks right, edit that area and check it again in the viewer you'll use to share the final model.
Which 3D File Format Should You Export?
Choose your export format based on where the 3D model will be opened next.
For the blue ceramic mug in our walkthrough, GLB is a good starting point if shoppers will rotate it on a product page. If a designer needs to edit the handle, ask which format their 3D editor imports reliably.
If you want to print a miniature version, use a format your slicer accepts and check that the model has the right dimensions and printable walls.
| Format | Best for | What to check |
| GLB | Interactive web previews and product-page viewers | The model faces the right way, its textures load and it runs smoothly on a phone. |
| OBJ | Handing off a static mesh for further editing | Include the accompanying .mtl material file and any separate textures if the recipient needs the model's appearance. |
| FBX | Editors and game engines that support it, especially when transferring a rig or animation | Check the scale, orientation, materials and any animation after importing. |
| STL | Basic 3D printing workflows and slicers that request it | Confirm the imported dimensions. STL stores the surface geometry without specifying the measurement unit. |
| 3MF | 3D printing workflows where the receiving slicer supports it | Confirm the dimensions and check what the slicer imported. Depending on the file and software, a 3MF can carry units and additional information such as materials or print settings. |
Format references.
Use GLB for a Web or Product Preview
GLB can package the model and its textures into a single file, which is useful when uploading a product asset to a website viewer. For the mug, export a GLB and open it in the same viewer shoppers will use.
Give it a full spin, zoom in on the rim and check that the blue glaze still looks right. Then try it on a phone to see how quickly it loads and how smoothly it rotates.
If it takes too long to load, try a smaller texture or a simpler mesh.
Compare the new export with the original at the zoom level shoppers will use. Check that reducing the file size hasn't flattened the shape of the handle or blurred a detail that helps someone understand the product.
Use OBJ or FBX When Someone Needs to Edit the Model
Ask the person receiving the file what their editor or engine handles best. OBJ is a practical option for a static object like the mug.
If the export creates separate material and texture files, send them together in the same folder so the recipient can open the model with its blue glaze intact.
FBX is worth considering if the destination supports it and the asset includes a rig or animation.
For example, if someone animates the mug tipping over, have them import the exported file and play the motion in the destination app.
For either format, check that the mug stands upright, imports at the expected scale and retains the materials the next person needs.
Use STL or 3MF for 3D Printing
Choose the format your slicer or print service requests. STL is a straightforward choice for transferring the mug's shape.
3MF can record measurement units and may carry additional print information, depending on how it was exported. Open either file in the slicer before sharing it or starting a print.
Check the model in this order:
- Confirm the physical size. If the miniature mug should be 45 mm tall, check the imported height in the slicer. If it comes in at a different size, correct the scale and check the width and depth too.
- Check that the mesh is closed. Run the mesh checker in your editor or slicer and look for open edges or holes. The mug can have an open top while still having a watertight mesh. The inside and outside surfaces should connect around the rim to form a continuous wall, and the handle should join the body cleanly.
- Check the thinnest areas. Look at the rim, mug wall and handle. If a section is too thin for your printer and settings, it may disappear from the sliced result or print weakly.
- Preview the sliced layers. Scrub through the preview from the base up. Check that the handle appears where you expect it, the cup walls stay continuous and the gaps you intended to leave open are still there.
An image to 3D model workflow can produce several useful exports from one asset. Keep the editable source, then label each approved file by purpose, such as mug-web.glb and mug-miniature-print.3mf.
That way, the person publishing the product page and the person preparing the print each know which file to use.
How to Clean Up an AI-Generated 3D Model Before Export
Say the blue mug looks good in your generator's preview, but the handle disappears from certain angles or the glaze looks stretched near the base.
Before you regenerate the whole thing, open the model in a 3D editor and take a closer look. A small repair might be all you need.
In an image to 3D model workflow, the amount of cleanup depends on what the asset is for. A still render might hide a rough patch underneath the mug.
Shoppers can see that patch if they rotate the model, and a slicer may struggle with a gap in the same area.
1. Check the mesh before touching the texture
Switch to a plain or solid view so you can inspect the shape without the blue glaze distracting you.
Rotate the model and zoom in where parts join, such as where the handle meets the mug.
- Look for unwanted holes or fused parts. If the handle opening is filled in, inspect that area before trying to smooth it. For a print, check that the mesh encloses the solid material. The top of the mug can stay open as long as the inner and outer walls connect around the rim.
- Check which way the faces point. Face normals tell the software which side of a surface faces out. If part of the mug disappears when viewed from outside, inspect the face orientation and recheck it in the destination viewer after fixing it.
- Simplify the mesh if it's slowing down the preview. Reducing the polygon count can help, but compare the simplified version with the original. The rim and the curve of the handle are good places to spot detail you've lost.
A mesh editor is useful for local repairs. For a model headed to print, follow up with a mesh check and layer preview in your slicer.
2. Fix texture problems where they show up
Turn the texture back on and compare the mug with the original photo. Look closely around the handle, rim and base, where the glaze may appear stretched or change colour abruptly.
A small blemish can often be painted over in a texture editor.
If the same image detail stretches across a curved surface, check the UV map, which controls how the flat texture wraps around the 3D shape.
If a bright reflection from the source photo stays fixed as you rotate the mug, try a reference shot taken in softer light. You can then use the material settings to control how shiny the glaze looks.
3. Set the scale for the intended use
If size matters, measure the real object or use dimensions from the brief.
For example, if you're printing a 45 mm miniature, set that height in the editor and confirm it again in the slicer.
For a scene or an augmented reality preview, check the imported model against a known-size object in the destination app.
This makes it easier to catch a unit mismatch before anyone builds around the asset.
4. Preview the cleaned-up model where it will be used
Save a new version after the cleanup and give it one last check in the tool that matters for the job.
- For a product page, rotate the mug in the web viewer on a phone. Make sure the handle opening stays visible and the glaze loads correctly.
- For a game or animation, import the model into the target engine or editor. Check that it sits upright, matches the scene's scale and moves correctly if it's animated.
- For a 3D print, scroll through the sliced layers. Look for gaps where the walls should be solid and check whether the handle and rim appear as expected.
Once those checks pass, use the format your viewer, editor or slicer supports. Keep the cleaned-up source file so you can make another export later if the asset needs to go somewhere else.
How Do You Hand Off a 3D Asset to Your Team?
You've fixed the mug's handle and sent the new model for review.
The next morning, someone leaves feedback on yesterday's draft. Now you have to work out which comments still apply.
A good handoff keeps the current model, its references and the approval together so anyone on the team can pick up where you left off.

How Do You Hand Off a 3D Asset to Your Team
1. Give the reviewer one place to start
Create a single review task or shared page.
Start with a line that explains where the asset will be used, such as "Shoppers will rotate this blue mug on the product page, including on mobile."
Then add the materials the reviewer needs:
- The original reference. Include the three-quarter photo and any extra views. Label the side shot so reviewers can quickly find the clearest view of the handle.
- The current draft. Add a link to a rotatable preview and put the version number beside it, such as mug-v02. Check that the reviewer can open it with their usual account.
- A note on what changed. If this is a revision, one sentence is enough. "The handle opening is wider in this draft. Please compare it with the side photo."
When you upload a new draft, update the preview link at the top of the task. Keep the earlier version available for comparison.
2. Give Each Reviewer a Short Checklist
"Can you take a look?" leaves the reviewer guessing what matters. Give each person a few checks they can answer without having to ask you for context.
- Product owner. Compare the blue glaze with the reference photo. Rotate the mug to see whether the rim, handle opening and overall shape match the product.
- Website owner. Open the preview on a phone. Check that it loads, responds to touch and lets you rotate the mug far enough to see the handle clearly.
- Final approver. Review any outstanding issues and record the decision in the task. If the team works across time zones, give the deadline with a time zone so everyone knows when feedback closes.
If you only need feedback on the handle this round, say so. It gives the reviewer a clear place to start and makes it easier to see whether the last edit solved the problem.
3. Keep Feedback Specific and in One Place
Ask reviewers to leave comments in the shared task.
A useful comment tells the editor three things:
- Which draft they opened.
- Where the issue appears, including the angle or device if it matters.
- What should change, with a reference photo or marked-up screenshot when that helps.
Inmug-v02, the bottom of the handle blends into the body when I turn the mug to the rear view. The side photo shows a clear gap. Could you reopen it where I've marked the screenshot?
If the team spots several issues, flag the ones that block publication.
A filled-in handle might need fixing before launch, while a faint mark on the underside can be reviewed separately. When you post the next draft, say what you changed and which issues are ready to check again.
4. Mark the Approved Export and Hand It Over
Once the reviewer signs off, open the exported file in the viewer shoppers will actually use. Give the mug a full spin and check that the textures load, it sits upright and the handle still looks right.
Then put the approved file at the top of the task, where the publishing team can find it quickly.
Include a short handoff note with:
- The file to publish, such as
mug-v03-web-approved.glb. - The destination, such as the blue mug's product page.
- The approval, including who signed off and when.
- The next action, such as "Upload this GLB to the product viewer and check it on mobile once it's live."
Keep the editable source, reference photos and earlier drafts in the project folder.
If the mug later comes in a new colour, the designer can find the source they need and the publishing team can still see exactly which file went live.
Related Guides on 3D Product Previews and Creative Workflows
Creating a visual reference, publishing a 3D product preview or handing the final model to a teammate? These guides cover each part of the workflow.
- How Ecommerce Brands Use Interactive 3D Product Previews
- Five Trends Shaping AI Image Generation
- How Teams Manage Shared Files, Versions and Approvals
If your model is headed for a product page, start with the 3D commerce guide. If several people will review the asset before it goes live, use the document management guide to plan how you’ll share drafts and identify the approved export.
5 Common Mistakes to Avoid When Creating 3D Models From Photos
In the mug walkthrough, the blue glaze, open handle and rounded rim give you three simple ways to judge the result.
If one of those details looks off, the fix might be as simple as taking a better photo or changing an export setting.
Here are five mistakes to watch for and what to do about each one.
1. Starting with a blurry or cluttered photo
Before you select Convert Image to 3D Model in your tool, zoom in on the source photo.
Can you see where the handle ends and the background begins?
Is the whole mug in frame? A busy backdrop or a dark shadow inside the handle can make the outline harder to interpret.
If you can retake the photo, use soft, even light and a plain background that contrasts with the object. A three-quarter view gives the generator a look at the front and one side. For the mug, turn it until the handle opening is clearly visible.
2. Treating the first draft as the finished asset
A photo to 3D model tool can give you a useful starting point.
Thin parts, transparent surfaces and small details can still come out differently from the original. A mug's rim might look fine in the preview and turn uneven when you tilt the model to look inside.
Check the details that matter for the final use.
For a still render, look from the intended camera angle.
For an interactive product page, rotate the model all the way around. If the shape is close and one area needs attention, a local edit may be quicker than generating another draft.
3. Forgetting to check the back and underside
In a 2D image to 3D model workflow, a single photo leaves some surfaces hidden.
If the mug looks round from the front but flat from behind, compare that area with the real object or a rear photo.
- Add a side view when the shape of the handle or another protruding part matters.
- Add a rear view when there's a label, seam or connector the original photo doesn't show.
- Use verified measurements if the asset needs to match the original dimensions or fit another part.
If your tool accepts multiple views, upload the extra angles when you regenerate. If it only accepts one image, keep the extra photos beside you while editing.
4. Sending the model to print before checking the mesh
If you're testing an image to 3D model for 3D printing workflow, open the export in your slicer before starting the print.
The mug should have an open top, but its inner and outer surfaces should meet at the rim so the walls form a closed volume.
- Run a mesh check for unwanted holes, overlapping faces or other geometry errors. Repair any issues that affect slicing.
- Confirm the imported size. If the miniature mug should be 45 mm tall, check the height in the slicer.
- Preview the layers. Look for missing sections around the rim and handle. Thin features can disappear in the sliced preview even when they look fine in a 3D viewer.
5. Choosing the format before checking where the file will go
Start with the app that will open the export.
A GLB may suit the product-page viewer and preserve the mug's blue glaze.
An STL carries the shape for printing, while a 3MF can also carry measurement units if the receiving slicer supports it. If a teammate needs to edit the mug, check which format their editor handles reliably.
Open the exported file in its destination app before you hand it over.
That quick check can catch missing textures, a mug that imports on its side or a print file that comes in at the wrong size.
Final Thoughts
The easiest way to go from image to 3D model is to start with one clear photo and decide what you need the finished asset to do.
For the blue mug in this guide, that meant matching the glaze, keeping the handle open and making sure shoppers could rotate it smoothly on a phone.
If the same mug were headed for a 3D printer, the checks would be different. You'd confirm its dimensions, inspect the mesh and preview the sliced layers.
Before you call your model finished, run through three quick checks:
- Compare it with the reference. Rotate it all the way around and look closely at details the original photo barely shows.
- Open the exported file where it'll actually be used. Try the product viewer, editor or slicer and check that the model appears as expected.
- Label the approved version. If you're handing it off to a teammate, tell them which file to use and where it goes.
If you're trying this for the first time, pick a simple object you can keep beside you. Take a three-quarter photo, generate a draft and turn it around on screen.
If something looks off, compare it with the real object. That'll help you decide whether to add another photo, make a small edit or go ahead with the export.
Frequently Asked Questions
Can you make a 3D model from a picture?
Yes. An image to 3D model tool can generate a draft from a clear picture of an object.
It uses the visible outline and surface details to estimate the shape, then fills in the parts it can't see.
Try a three-quarter view so the tool can see the front and one side. Once you've turned the picture into a 3D model, rotate it and compare the back and underside with the real object or additional photos.
Can I turn a sketch into a 3D model?
Yes. A sketch is a good starting point for a concept model.
Use a clear outline and show details that affect the shape, such as the gap inside a mug's handle. If the sketch only shows the front, the generator has to guess how deep the object is.
Add a side sketch if the tool accepts multiple views and the depth matters.
Do I need more than one photo?
One photo can be enough for a rough mock-up.
If you're building a 3D model with photos for an interactive product page, extra angles help when the object has details shoppers will want to see from the sides or back.
For example, a side photo can show the shape of the mug's handle, while a rear photo can show where it joins the body. Use photos of the same object under consistent lighting.
What's the difference between a photo-to-3D model tool and photogrammetry?
A photo to 3D model generator can estimate the full shape from one photo.
Photogrammetry builds a 3D model from photographs by matching visible features across multiple overlapping shots.
If you're turning a picture into 3D for a quick concept, one good image may be enough.
If you need to capture the shape of an existing object from all sides, a carefully planned set of overlapping photos gives you more to work with.
Can I convert an image to a 3D model for free?
Some tools offer a free tier or trial so you can test a picture to 3D model workflow. If you search for "image to 3D model free", check what the free option includes.
Can you download the model or only preview it? Does it export the format you need?
If the asset is going on a product page, check whether the terms allow commercial use.
Can I 3D print a model made from a photo?
Yes, if the model is suitable for printing. After turning the photo into a 3D model, open the export in your slicer and confirm the physical dimensions.
Check for unintended holes and parts that are too thin to print. For the mug example, the top can stay open, but the inner and outer surfaces need to join at the rim so the wall forms a closed volume.
Preview the sliced layers before starting the print.
What's the difference between a 3D preview and a downloadable model?
Searches like "pic to 3D model", "image 3D model" and "3D model pic" can bring up both preview images and tools that generate a downloadable file. If you need to rotate, edit or print the object, check that you can export the model itself.
A screenshot shows one view. A file such as a GLB lets you open the model in a compatible web viewer, while an STL or 3MF can go into a compatible slicer for printing.
AI Summary
- An image to 3D model workflow uses AI to estimate an object’s shape from a photo or sketch. With a single image, the tool fills in surfaces it cannot see. Use extra reference angles when the back, sides or underside need to match the real object.
- Decide where the finished asset will be used and approve the reference image or concept before generating a draft. Text to 3D, Image to 3D and Multi-view to 3D are separate options. Choose the one that fits the reference material you have.
- Inspect the first draft from several angles. If the shape is wrong, try a clearer reference or repair the affected part of the mesh. If the shape looks right but the surface looks stretched or uneven, adjust the texture or how it wraps around the model.
- Choose an export format your destination supports. GLB works for many web viewers, OBJ or FBX can suit editing workflows, and STL or 3MF can be used for 3D printing. Before printing, confirm the dimensions, check that the mesh is closed and preview the sliced layers.
- Test the export in the viewer, editor or slicer that will use it. For a team handoff, share the approved file alongside the source images, a preview and a version number so everyone can identify the right asset.
Most Popular Posts

Effective communication among team members is vital for the productivity and success of any organization. Surprisingly, 60% of companies lack a long-term internal communication strategy, which p...


Businesses thrive on communication for efficiency, productivity and accomplishment. When the right information is passed from the right designation in the organization, it promotes positivity an...

Categories
Blog
(3266)
Business Management
(399)
Employee Engagement
(239)
Digital Transformation
(227)
Growth
(153)
Intranets
(142)
Internal communications
(111)
Remote Work
(68)
Sales
(53)
Collaboration
(53)
Customer Experience
(34)
Culture
(30)
Project management
(30)
Knowledge Management
(29)
Leadership
(20)
Comparisons
(9)
News
(1)

Related Posts

Have you ever wished you could grab a product photo and turn it around to see the back? An image to 3D model workflow lets you start with a photo or sketch and use AI to create something you can rotate and inspect. The first draft might look gr...

Could your next marketing hire cost you more than the results they deliver? If you're weighing up in-house marketing vs agency support—or considering a dedicated remote marketer—the hardest part is knowing what your money will actually buy. You need ...

If employee satisfaction dropped on your team tomorrow, how soon would you know? If your next chance to ask is the annual survey, you could spend months missing the small frustrations that make work harder every day. In a 2024 Pew Research Center sur...

Ever cancelled a meeting to give your team more focus time, only to watch that time disappear into Slack pings, email alerts and "quick questions"? That's how context switching at work can eat into the time you thought you'd got back. In a rece...

How much time does your team spend turning a simple company update into something employees will actually read? AI for internal communications can help you move from rough notes to a clear announcement, newsletter or leadership message, with mo...


Annet Herges
I am a digital nomad, lover of exploring new places and making friends.
I love to travel and I love the internet. I take pictures of my travels and share them on the internet using Instagram.
Traveler, entrepreneur, and community builder. I share my insights on digital marketing and social media while inspiring you to live your fullest life.
Ready to learn more? 👍
One platform to optimize, manage and track all of your teams. Your new digital workplace is a click away. 🚀
Free for 14 days, no credit card required.