
Insight Blog
Agility’s perspectives on transforming the employee's experience throughout remote transformation using connected enterprise tools.
29 minutes reading time
(5805 words)
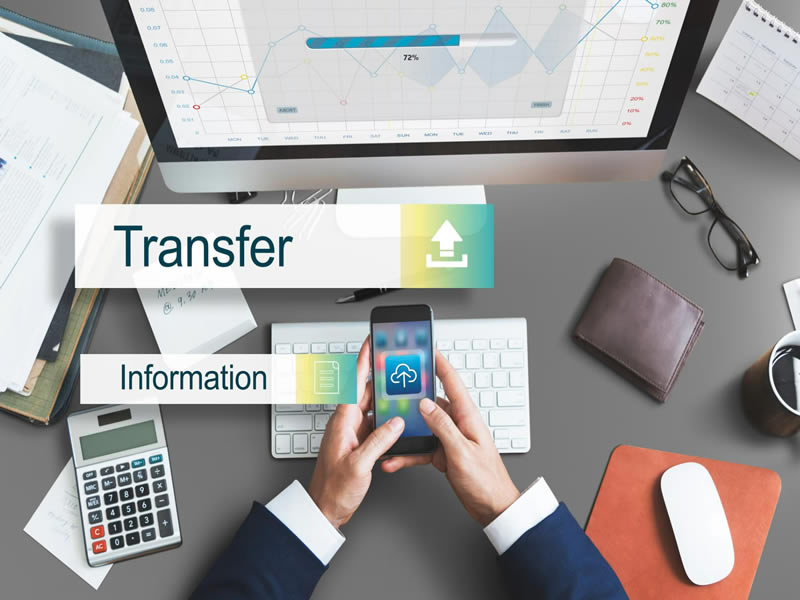
Confluence To Sharepoint Migration: Sharepoint Migration Tools

Confluence To Sharepoint Migration: Sharepoint Migration Tools
When it comes to migrating your data to SharePoint, using the SharePoint Migration Assessment Tool can streamline the process and ensure a successful transition.
Confluence To Sharepoint Migration: Sharepoint Migration Tools

In today's digital age, businesses are constantly evolving, adopting new technologies, and seeking efficient ways to manage their data. SharePoint, developed by Microsoft, has become a popular platform for collaboration and content management among organizations.
When it comes to migrating your data to SharePoint, using the SharePoint Migration Assessment Tool can streamline the process and ensure a successful transition.
In this article, we will guide you through the steps of utilizing this powerful tool and optimizing your SharePoint migration.
Migrate Confluence To Sharepoint: Confluence To Sharepoint Migration
Microsoft SharePoint is currently one of the most popular platforms for data storage and document management.
Many individuals and organizations are transitioning to SharePoint due to its extensive range of valuable features and its seamless migration process.
If you currently use Confluence and are considering migrating to SharePoint, you'll find the transition to be relatively straightforward. In this article, we will explore the fundamental aspects of migrating from Confluence To Sharepoint Migration.
The SharePoint Migration Assessment Tool is a comprehensive solution designed to evaluate your existing environment and assess its compatibility with SharePoint.
By analyzing your data, sites, and permissions, the tool generates detailed reports that help you identify potential migration challenges and plan accordingly. Its key features include:
- Inventory Analysis: The tool scans your current environment, including file shares, SharePoint on-premises, and other content sources, to create an inventory of your data, sites, and user permissions.
- Pre-Migration Assessment: It performs a thorough analysis of your inventory, identifying potential issues such as unsupported file types, large files, or complex permission structures. This assessment enables you to mitigate risks before migrating to SharePoint.
- Data Mapping and Planning: The tool offers insights into the structure and organization of your data, helping you plan the migration process effectively. It assists in mapping source and target sites, content types, and metadata, ensuring a seamless transition.
- Security and Compliance: The SharePoint Migration Assessment Tool provides security-focused reports, highlighting potential security vulnerabilities and compliance risks. This helps you maintain data integrity and adhere to regulatory requirements.
Things To Do Before You Migrate Confluence To Sharepoint

Things To Do Before You Migrate Confluence To Sharepoint
You have decided to transition from Confluence to SharePoint, but you're unsure about the initial steps.
It's crucial to consider various important factors, including taking necessary precautions, migrating information in the correct sequence, and ensuring the seamless functionality and accessibility of the transferred data in SharePoint.
The following guidelines will assist you in formulating a successful migration plan from Confluence to SharePoint.
#1.Plan and strategize
Develop a comprehensive migration plan that outlines the scope, goals, and timeline of the migration project.
Identify the specific content, spaces, and permissions that need to be migrated from Confluence to SharePoint.
- Define migration goals: Clearly articulate the objectives and goals you want to achieve through the migration, such as improving collaboration, enhancing document management, or consolidating platforms.
- Assess content and user requirements: Analyze your Confluence content and understand the specific content types, user permissions, and access requirements that need to be migrated to SharePoint.
- Map Confluence to SharePoint: Create a mapping document that aligns the structure, spaces, and pages of Confluence with the corresponding sites, libraries, and folders in SharePoint.
- Plan the migration timeline: Determine the appropriate timeline for the migration process, considering factors such as the volume of content, complexity, and potential impact on users' daily work.
- Establish a communication plan: Develop a comprehensive communication plan to inform all stakeholders about the migration, including the timeline, benefits, and any changes in workflows or access.
- Define user training and support: Identify the training needs of users who will be working with SharePoint and develop a training program to ensure they understand the platform's features and functionalities.
- Evaluate and select migration tools: Research and evaluate migration tools that support the migration from Confluence to SharePoint. Consider factors such as data integrity, metadata mapping, and automation capabilities.
- Perform a test migration: Conduct a test migration using a subset of your Confluence content to validate the migration process, assess the quality of migrated content, and identify any issues or areas for improvement.
- Develop a rollback plan: Prepare a contingency plan in case any unexpected issues arise during the migration. Define the steps to revert back to Confluence temporarily while addressing the issues.
- Monitor and evaluate post-migration: Continuously monitor the performance and user feedback after the migration to identify any further improvements or adjustments needed. Gather insights to assess the success of the migration against the defined goals.
It is important to adapt and tailor the plan based on the specific needs and requirements of your organization.
#2.Analyze and clean up existing content
Perform a thorough analysis of your Confluence content to identify any outdated, irrelevant, or redundant information.
Remove or update such content to ensure that only relevant and valuable information is migrated to SharePoint.
- Assess content relevance: Review the existing Confluence content and determine its relevance to the migration. Identify any outdated, redundant, or irrelevant content that should not be migrated.
- Engage content owners: Collaborate with content owners, space administrators, and relevant stakeholders to understand the purpose and context of each piece of content. Gather their input on what should be migrated and what can be archived or deleted.
- Categorize content: Categorize the content based on its type, importance, and usage. Identify critical documents, frequently accessed information, and content that may require special handling during the migration.
- Perform a content inventory: Create a comprehensive inventory or catalog of the content you plan to migrate. Include information such as file names, sizes, creation dates, and ownership to track and manage the content effectively.
- Review metadata: Evaluate the metadata associated with the Confluence content, such as tags, labels, and properties. Clean up and standardize the metadata to ensure consistency and accuracy during the migration.
- Identify duplicate content: Use tools or manual methods to identify duplicate content within Confluence. Consolidate or remove duplicate copies to avoid redundancy and optimize storage in SharePoint.
- Review file attachments: Analyze any file attachments in Confluence pages. Determine if they are still relevant and necessary. Consider migrating them as separate documents or integrating them into the main content where appropriate.
- Check formatting and structure: Review the formatting, structure, and organization of the content. Ensure consistency in headings, paragraphs, bullet points, tables, and other formatting elements. Make adjustments as needed to maintain a clean and consistent look in SharePoint.
- Address broken links: Identify any broken links within the Confluence content. Update or remove these links before the migration to ensure that they do not lead to inaccessible or irrelevant content in SharePoint.
- Document archiving or deletion: Develop a strategy for archiving or deleting content that is no longer needed. Define retention policies based on legal requirements, business needs, and best practices. Archive or delete content accordingly, following proper procedures and obtaining necessary approvals.
By following these steps, you can effectively analyze and clean up the existing Confluence content, ensuring that only relevant, high-quality, and valuable content is migrated to SharePoint. This will help streamline the migration process and enhance the user experience in the new platform.
#3.Define SharePoint structure
Plan and create a logical structure for your SharePoint site, including libraries, lists, and folders. Align this structure with your organization's requirements and the way your Confluence content is organized.
When defining the SharePoint structure for migrating from Confluence to SharePoint, consider the following steps:
- Analyze how the content is organized in Confluence, including spaces, pages, and hierarchy. Identify the different types of content and their relationships.
- Familiarize yourself with SharePoint's features and capabilities for organizing content, such as sites, libraries, lists, folders, and metadata. Understand how these components can be leveraged to meet your organization's needs.
- Decide on the overall structure of SharePoint sites. Consider creating sites based on departments, teams, projects, or any other relevant organizational structure that aligns with your Confluence spaces.
- Map each Confluence space to a corresponding SharePoint site. Ensure that the site's purpose, permissions, and settings match the requirements of the space being migrated.
- Determine the document libraries needed within each SharePoint site. Consider factors such as content type, security requirements, and metadata. Create libraries that reflect the categories or topics of the Confluence spaces being migrated.
- Identify any additional lists or metadata requirements for the content being migrated. Determine the fields, columns, and data types needed to capture relevant information and facilitate efficient content organization and searchability.
- Within each document library, plan the folder structure that will be used to organize the content. Consider organizing folders based on topics, projects, or any other logical grouping that aligns with your Confluence spaces.
- Develop consistent naming conventions for sites, libraries, lists, folders, and files in SharePoint. Ensure that the naming conventions are intuitive, descriptive, and adhere to your organization's guidelines.
- Determine the appropriate permissions and access control settings for each SharePoint site, library, and folder. Align the permissions with the user roles and access levels defined in Confluence to ensure data security and proper content management.
- Create a clear and comprehensive documentation of the planned SharePoint structure. Include diagrams, site maps, and guidelines to help users understand and navigate the new environment effectively.
By following these steps, you can define a well-structured SharePoint environment that aligns with your Confluence content organization. This will facilitate a smooth migration process and provide a user-friendly experience for SharePoint users.
#4.Establish user permissions
Determine the appropriate user permissions for your SharePoint site and its content. Ensure that the permissions align with your organization's security policies and that users have the necessary access to perform their roles effectively.
When establishing user permissions during the migration from Confluence to SharePoint, consider the following steps:
- Evaluate the user permissions in Confluence and understand the access levels and roles assigned to different users or groups. Identify any specific permission settings that need to be carried over to SharePoint.
- DFamiliarize yourself with the available permission levels in SharePoint, such as Full Control, Edit, Read, or custom permission levels. Determine which permission levels align with the access levels in Confluence.
- Map the Confluence permission settings to the equivalent SharePoint permission levels. Identify any adjustments or modifications needed to align the access permissions in SharePoint with the requirements of your organization.
- Decide on the permissions for SharePoint sites. Consider which users or groups should have access to specific sites based on their roles, responsibilities, and the content being migrated from Confluence.
- Determine the permissions for SharePoint document libraries and folders. Define who should have access to view, edit, delete, or manage specific content within each library or folder. Align these permissions with the access settings in Confluence.
- Identify any content or areas within SharePoint that require unique or custom permissions. Assess whether specific documents, folders, or lists need different access levels or should be restricted to specific users or groups.
- Decide whether permissions in SharePoint should inherit from higher-level sites, libraries, or folders. Determine if there are any specific cases where permissions should break inheritance and be set independently.
- Create user groups or security groups in SharePoint to simplify permission management. Assign users to the appropriate groups based on their roles and the level of access they require. Ensure consistency with the user groups defined in Confluence.
- Perform tests to validate the assigned permissions in SharePoint. Verify that users have the intended access and that any restrictions or limitations are properly implemented. Rectify any permission-related issues before the final migration.
- Document the established permission settings in SharePoint, including the assigned permission levels, user groups, and any unique permissions. Maintain clear and up-to-date documentation for reference and future management.
This will ensure that users have the appropriate access rights during and after the migration, maintaining data security and facilitating effective collaboration in SharePoint.
#5.Train users
Provide training and guidance to users who will be working with SharePoint. Familiarize them with the platform's features, functionalities, and any changes in workflows that may occur during the migration.
After migrating from Confluence to SharePoint, it's crucial to provide training to users to ensure a smooth transition and help them effectively navigate and utilize the new platform. Here are steps to train users after the migration:
- Create a comprehensive training plan that outlines the objectives, topics, and delivery methods for user training. Consider different learning styles and preferences of your users.
- Assess the training needs of different user groups based on their roles, responsibilities, and the specific features of SharePoint they will be utilizing. Determine the level of training required, such as basic navigation, content creation, or advanced workflows.
- Develop user-friendly training materials, such as guides, manuals, video tutorials, or interactive online modules. Ensure that the materials cover the essential features, tasks, and best practices for working in SharePoint.
- Schedule and conduct training sessions, either in-person or virtually, based on the needs and availability of the users. Consider offering multiple sessions to accommodate different schedules and preferences.
- Provide hands-on demonstrations of key features and functionalities in SharePoint. Show users how to navigate the interface, create and edit content, manage documents, collaborate, and perform common tasks they regularly performed in Confluence.
- Tailor the training content and examples to the specific roles and responsibilities of different user groups. Highlight how SharePoint can enhance their work processes and improve collaboration within their respective functions.
- Allow users to explore SharePoint in a sandbox or training environment. Provide guided exercises or scenarios that encourage them to practice using the platform's features. Offer support and guidance during the practice sessions.
- AAnticipate and address common challenges or questions that users may encounter during the transition. Prepare a list of frequently asked questions (FAQs) and troubleshooting tips to support users in overcoming initial hurdles.
- Offer ongoing support channels for users to seek assistance and clarify any doubts after the training sessions. This can include a dedicated support email, a knowledge base, or a designated SharePoint support team that can provide guidance and address user queries.
- Encourage users to provide feedback on the training materials and sessions. Conduct evaluations or surveys to gather insights on the effectiveness of the training and identify areas for improvement.
You can ensure that users are equipped with the necessary knowledge and skills to effectively use SharePoint after migrating from Confluence. This will support a successful transition and enable users to leverage the full potential of SharePoint's features and collaboration capabilities.
#6.Communicate the migration plan
Inform all stakeholders, including Confluence users and relevant teams, about the upcoming migration. Clearly communicate the reasons for the migration, the expected timeline, and any impact it may have on their work processes.
When migrating from Confluence to SharePoint, effective communication with stakeholders is essential to ensure a smooth transition. Here are steps to communicate the migration plan:
- Identify the stakeholders who will be impacted by the migration, including executives, managers, teams, and end-users. Consider their roles, responsibilities, and the level of involvement they have in the migration process.
- Develop a clear and concise message that communicates the purpose, benefits, and timeline of the migration. Clearly articulate why the migration is being conducted and how it aligns with the organization's goals.
- Customize the communication messages to address the specific concerns and interests of different stakeholder groups. Highlight the benefits and impact of the migration on their respective roles and workflows.
- Select the most appropriate communication channels to reach each stakeholder group effectively. This can include email, company newsletters, intranet announcements, team meetings, or dedicated communication platforms.
- Develop a detailed communication plan that outlines the timing, frequency, and content of the messages to be delivered. Ensure that the plan covers the pre-migration, migration, and post-migration phases.
- Offer a comprehensive overview of the migration plan, including the timeline, key milestones, and any changes in workflows or access. Help stakeholders understand what to expect during each phase of the migration.
- Anticipate potential concerns or questions from stakeholders and provide clear and concise answers. Establish channels, such as a dedicated email or a FAQ document, where stakeholders can submit their questions and receive prompt responses.
- Emphasize the training and support resources available to stakeholders during and after the migration. Provide information on training sessions, user guides, and support channels to ensure a smooth transition and minimize disruption.
- Encourage stakeholders to provide feedback, suggestions, and insights throughout the migration process. Create opportunities for their active participation and involvement, such as focus groups or feedback surveys.
- Continuously communicate updates, progress, and any changes to the migration plan. Keep stakeholders informed about milestones achieved and address any unforeseen challenges or adjustments to the timeline.
This will help minimize resistance, manage expectations, and foster a collaborative environment during the migration from Confluence to SharePoint.
#7.Test the migration process
Set up a test environment where you can perform trial migrations to identify any potential issues or challenges. Test the migration process thoroughly to ensure a smooth transition from Confluence to SharePoint.
After migrating from Confluence to SharePoint, it is crucial to thoroughly test the migration process to ensure the integrity of the migrated content and the functionality of the SharePoint environment.
Here are steps to test the migration process:
- Define a clear testing strategy that outlines the objectives, scope, and methodologies for testing the migration. Determine the key areas and scenarios that need to be tested.
- Develop a comprehensive test plan that outlines the specific test cases, test data, and expected results for each aspect of the migration process. Include both functional and non-functional testing criteria.
- Verify the integrity and accuracy of the migrated content in SharePoint. Compare the migrated content with the original content in Confluence, ensuring that all text, formatting, attachments, and metadata are intact.
- Validate the links within migrated documents to ensure they are functioning correctly in SharePoint. Check hyperlinks, attachments, and references to other documents or pages within the migrated content.
- Validate the permissions assigned to migrated documents and folders. Ensure that users have the appropriate access levels and that security settings are consistent with the permissions defined in Confluence.
- Conduct functional testing of SharePoint features and functionalities. Test tasks such as document creation, editing, versioning, searching, coVerify that the metadata associated with the migrated content has been accurately mapped and transferred to SharePoint. Test metadata-based functionalities, such as filtering, sorting, and searching based on metadata attributes.
- Conduct performance testing: Assess the performance of SharePoint after the migration, including page load times, document upload and download speeds, and response times for various operations. Identify any bottlenecks or performance issues and address them accordingly.
- Validate the workflows and processes that users typically perform in SharePoint, such as content approvals, document routing, or collaboration workflows. Ensure that the migrated content behaves as expected within these workflows.
- Involve users in the testing process and encourage them to provide feedback on their experience with the migrated content and the SharePoint environment. Gather their insights on usability, functionality, and any issues they encounter.
- Based on the test results and user feedback, refine the migration process, make necessary adjustments, and retest as needed. Address any identified issues or gaps before proceeding with the final migration.
This helps ensure a successful transition, data integrity, and a positive user experience in the SharePoint environment.
#8.Backup Confluence data
Create a backup of your Confluence data before initiating the migration process. This ensures that you have a reliable copy of your content in case any issues arise during or after the migration.
After migrating from Confluence to SharePoint, it is important to backup your Confluence data to ensure you have a reliable copy of your content. Here are steps to backup Confluence data after the migration:
- Before initiating the backup process, ensure that the migration from Confluence to SharePoint has been completed successfully. Confirm that all desired content has been migrated and is accessible in SharePoint.
- Determine which Confluence data needs to be backed up. This may include spaces, pages, attachments, templates, macros, or any other custom content that was not migrated to SharePoint.
- Select a backup method that suits your requirements and infrastructure. This can include using built-in Confluence backup utilities, exporting content to XML or HTML format, or utilizing third-party backup tools.
- Establish a regular backup schedule to ensure that your Confluence data remains up-to-date. Determine the frequency of backups based on the rate of content updates and the criticality of the data.
- Decide where the backup files will be stored. Consider secure storage options such as network drives, cloud storage, or dedicated backup servers. Ensure that the backup files are protected from unauthorized access or loss.
- Initially, perform a full backup of the Confluence data after the migration. This ensures that you have a complete and comprehensive copy of your content as a starting point.
- For subsequent backups, consider using incremental backup methods to capture only the changes made since the last backup. This reduces backup time and storage requirements while ensuring data integrity.
- Regularly test the integrity of the backup files to ensure they can be successfully restored. Perform test restores on a non-production environment to validate the backup process and ensure that the data can be recovered if needed.
- Maintain clear documentation of the backup process, including the schedule, backup location, and restoration procedures. This documentation will be useful in case of a disaster or when migrating to new platforms in the future.
- Regularly monitor the backup operations to ensure that they are running as scheduled and that backup files are being created successfully. Set up alerts or notifications to be informed of any backup failures or errors.
This ensures data security, provides a backup in case of any issues, and allows you to maintain a reliable copy of your content for future reference or restoration needs.
#9.Evaluate and select migration tools
Explore available migration tools and assess their suitability for your migration project. Choose a tool that supports the migration of your Confluence data to SharePoint, taking into account factors such as data integrity, mapping capabilities, and ease of use.
When evaluating and selecting migration tools for migrating from Confluence to SharePoint, follow these steps:
- Clearly define your specific migration requirements, such as the types of content to be migrated, the volume of data, the desired level of automation, and any specific data mappings or transformations needed.
- Conduct thorough research to identify the migration tools available in the market for Confluence to SharePoint migration. Consider both commercial tools and open-source options.
- Ensure that the migration tools you evaluate are compatible with your versions of Confluence and SharePoint. Confirm whether the tools support the specific versions and configurations you are working with.
- Evaluate the features and capabilities of each migration tool. Look for functionalities such as data mapping, metadata preservation, permissions migration, versioning, and support for various Confluence content types.
- Assess the user-friendliness of the migration tools. Look for tools that offer intuitive interfaces, clear instructions, and ease of use, as they will facilitate a smoother migration process.
- Verify that the migration tools have mechanisms in place to ensure data integrity during the migration. Check if they provide options for data validation, error handling, and reporting to track the success and accuracy of the migration.
- Consider the performance and scalability of the migration tools. Look for tools that can handle large volumes of data efficiently and provide a reliable migration experience without compromising speed or stability.
- Assess the level of support provided by the tool vendors. Look for documentation, user guides, tutorials, and forums that can assist you during the migration process. Evaluate the vendor's reputation and responsiveness to customer inquiries or issues.
- Whenever possible, conduct trials or proofs of concept with the shortlisted migration tools. Test them using a representative sample of your Confluence content to assess their effectiveness, accuracy, and ease of use.
- Evaluate the cost of the migration tools, including any licensing fees, maintenance costs, or additional charges. Compare the pricing models of different tools and assess their value in relation to their features and capabilities.
- Reach out to other organizations or professionals who have previously migrated from Confluence to SharePoint. Seek their recommendations and insights on the migration tools they used, and inquire about their experiences and challenges.
By following these steps, you can evaluate and select the most suitable migration tool for your Confluence to SharePoint migration project. Choosing the right tool will help streamline the migration process, ensure data integrity, and optimize the transition to the SharePoint platform.
#10.Run a pilot migration
Before performing the final migration, run a pilot migration with a small subset of your Confluence content. This allows you to evaluate the results, address any potential issues, and refine your migration process if necessary.
Running a pilot migration after migrating from Confluence to SharePoint allows you to test the migration process on a smaller scale before proceeding with the full migration. Here are the steps to run a pilot migration:
- Determine the scope of the pilot migration, including the specific Confluence content, spaces, or users that will be included. Select a representative subset of data that covers different content types and scenarios.
- Define the objectives of the pilot migration. These may include testing the migration process, evaluating the quality of migrated content, identifying any issues or challenges, and gathering feedback from users.
- Set up a separate test environment that replicates the target SharePoint environment. This allows you to perform the pilot migration without impacting the live SharePoint environment.
- Choose the migration tools that you have evaluated and selected for the full migration. Ensure that the selected tools are properly configured and ready to perform the pilot migration.
- Prepare the test data that will be migrated during the pilot. This may involve exporting specific Confluence content or creating sample content that closely resembles the actual data you will be migrating.
- Execute the migration process using the selected migration tools on the test environment. Follow the established migration plan and ensure that all necessary configurations and mappings are applied accurately.
- Validate the content that has been migrated to SharePoint during the pilot. Check for data integrity, formatting, attachments, metadata, and any specific requirements identified for the migration. Compare the migrated content with the original Confluence content for accuracy.
- Test the functionality and workflows of SharePoint using the migrated content. Perform tasks such as document editing, versioning, searching, collaboration, and any other critical processes that were performed in Confluence.
- Engage the pilot users and gather their feedback on the migration process and the SharePoint environment. Collect their observations, comments, and any issues they encountered during the pilot migration.
- Evaluate the results of the pilot migration and compare them against the defined objectives. Identify any issues, gaps, or areas for improvement. Make necessary adjustments to the migration process, configurations, or tools based on the insights gained from the pilot.
- Document the lessons learned from the pilot migration, including the successes, challenges, and recommendations for improvement. These insights will be valuable in refining the migration plan and addressing potential issues for the full migration.
This helps ensure a smoother and more successful transition from Confluence to SharePoint.
Best Sharepoint Migration Tools
Sharepoint Migration Tools
The usage of Microsoft SharePoint has witnessed a significant rise, particularly among cloud-based users, with an increase of 19 percentage points in recent years.
In the previous year, approximately 86 percent of Microsoft SharePoint users opted for cloud-based servers instead of on-premises servers.
This trend encourages businesses to leverage SharePoint migration tools, preferably with the assistance of an experienced SharePoint development company.
Follow us and access great exclusive content everyday: Follow us on Google News
#1.ShareGate Migration Tool
Sharegate is a migration tool specifically designed for SharePoint and Office 365 environments. It is widely recognized as a popular and reliable solution for managing and executing SharePoint migrations. Sharegate offers a comprehensive set of features that facilitate the smooth transfer of content, structure, and permissions from various sources to SharePoint.
With Sharegate, users can migrate documents, lists, libraries, sites, and other SharePoint artifacts between different SharePoint versions, as well as from on-premises SharePoint to SharePoint Online (Office 365) and vice versa. It supports both incremental and full migrations, allowing organizations to efficiently transfer their data while minimizing downtime.
In addition to migration capabilities, Sharegate provides a range of functionalities to streamline SharePoint management tasks. It offers features such as content management, permission management, reporting, auditing, and security enforcement.
These features enable administrators to easily manage and govern their SharePoint environments, ensuring data integrity, compliance, and optimal performance.
Overall, Sharegate simplifies the complex process of SharePoint migration and empowers organizations to efficiently leverage the capabilities of SharePoint and Office 365 platforms.
Overall, Sharegate simplifies the complex process of SharePoint migration and empowers organizations to efficiently leverage the capabilities of SharePoint and Office 365 platforms.
#2.CodePlex Migration Tool
CodePlex, an open-source project hosting portal, falls under the umbrella of the renowned Microsoft brand. It provides a platform for creating and sharing projects with the global community, collaborating with others on their projects, and accessing open-source software.
All of these offerings are made possible by CodePlex, which allows users to explore projects without requiring a login. However, it is strongly recommended for all CodePlex users to log in to maximize the benefits.
Using CodePlex is a hassle-free experience. By logging in with your existing Microsoft Office account, you can effortlessly access the features offered by CodePlex.
The workspace provided by CodePlex serves multiple purposes, including the creation and testing of SharePoint services, among other functionalities. While there are numerous exporters/importers available for download, there are currently none specifically designed for SP 2013.
You may also like: Best Apps for Employees: UPDATED 2022 – A Complete Guide
#3.ProvenTeq Migration Tool
Proventeq specializes in content migration and offers comprehensive consulting services and advanced technology solutions for businesses aiming to migrate their data.
Their expertise extends beyond SharePoint migration, encompassing the capability to migrate data from any content repository to any corporate Content Management System (CMS). Additionally, Proventeq provides valuable recommendations based on the specific needs and goals of the organization.
While Proventeq's focus is not exclusively on SharePoint migration, they dedicate a considerable amount of attention to SharePoint 2010, 2013, and Office 365, recognizing the significance of SharePoint in today's workplace.
While Proventeq's focus is not exclusively on SharePoint migration, they dedicate a considerable amount of attention to SharePoint 2010, 2013, and Office 365, recognizing the significance of SharePoint in today's workplace.
They possess the expertise to migrate content from older SharePoint versions to newer ones, as well as to SharePoint Record Center. Moreover, their latest update, the Office 365 Migration Accelerator, enables the migration of internally hosted applications, including file sharing.
Proventeq offers comprehensive content migration solutions, leveraging their expertise in SharePoint migration alongside their ability to migrate data across various content repositories and CMSs.
Their services encompass both traditional SharePoint versions and the modern Office 365 environment, providing organizations with efficient and effective migration options.
#4.PCVITA
The PCVITA SharePoint Express Migrator has been included in the list of SharePoint migration solutions for 2022. This is because it possesses a wide range of features that make it stand out.
It provides a user-friendly graphical interface that simplifies the process of migrating your corporate SharePoint plan.
The PCVITA SharePoint Migrator software is more efficient than standard SharePoint migration tools and software packages when it comes to transferring your files to a SharePoint environment.
Free ebook: How To Get Your Intranet Off The Ground
#5.AvePoint DocAve
AvePoint's DocAve is the first tool listed among SharePoint migration tools and stands out as a prominent name with well-established features that dominate the market for the best SharePoint migration tools.
One notable quality that sets it apart is its ability to incorporate modules for transferring 14 legacy systems to existing or older versions of SharePoint, such as 2010, 2013, and even the online version.
In addition, DocAve encompasses other newer features like DocAve Migrators and DocAve Material Manager, which enable users to efficiently reorganize content within seconds. By using DocAve, users gain comprehensive SharePoint management, protection, and replication control. All modules can be easily managed through a browser-based interface and customized to meet the specific requirements of any organization.
In addition, DocAve encompasses other newer features like DocAve Migrators and DocAve Material Manager, which enable users to efficiently reorganize content within seconds. By using DocAve, users gain comprehensive SharePoint management, protection, and replication control. All modules can be easily managed through a browser-based interface and customized to meet the specific requirements of any organization.
AvePoint has also introduced the latest versions of its software, including the advanced DocAve Online Service Pack 1, which enhances the management of Office 365 deployments and offers backup and recovery capabilities for Exchange Online.
Furthermore, Compliance Guardian Service Pack (SP) 1, released in June, incorporates functionality for file shares and web compliance.
How To Use Sharepoint Migration Assessment Tool

How To Use The Sharepoint Migration Assessment Tool
The SharePoint Migration Assessment Tool is a valuable resource for organizations looking to migrate their data and content to SharePoint Online.
This tool helps assess the current environment and provides insights and recommendations for a successful migration.
Here's a guide on how to use SharePoint Migration Assessment Tool effectively.
- Preparation: Before using the tool, ensure that you have the necessary permissions to access the source environment and the target SharePoint Online site. Gather information about the source environment, such as server versions, customizations, and the content structure.
- Installation: Download and install the SharePoint Migration Assessment Tool from the official Microsoft website. Make sure to install the appropriate version compatible with your system.
- Configuration: Launch the tool and enter the necessary credentials to connect to both the source and target environments. Provide the required information, such as source site URL, target site URL, and user authentication details.
- Data Collection: The tool will scan the source environment, collecting information about the site structure, content types, lists, libraries, and customizations. This process may take some time, depending on the size and complexity of the source environment.
- Analysis and Reports: Once the data collection is complete, the tool generates detailed reports, providing insights into potential migration challenges, such as unsupported features, customizations, and content dependencies. It also suggests best practices and recommendations for a successful migration.
- Review and Planning: Analyze the generated reports and identify any potential issues or complexities that may arise during the migration process. Use the recommendations provided to plan the migration strategy, including content mapping, resolving unsupported features, and addressing customizations.
- Migration Execution: Armed with the insights and recommendations from the SharePoint Migration Assessment Tool, proceed with the migration process. Utilize the recommended migration tools and methodologies to transfer the content, ensuring minimal disruption to users.
- Post-Migration Validation: After the migration, perform a thorough validation of the migrated content to ensure its integrity and functionality. Compare the pre-migration and post-migration environments to ensure all necessary data and customizations have been successfully transferred.
The SharePoint Migration Assessment Tool simplifies the migration planning process by providing a comprehensive analysis of the source environment. For organizations working with complex data sets in spreadsheets, it can be helpful to Convert MS Excel to PDF before migration to ensure consistent formatting and easy accessibility during the transition.
By following these steps, organizations can leverage the tool to successfully migrate their data and content to SharePoint Online, minimizing risks and ensuring a smooth transition.
Most Popular Posts

Effective communication among team members is vital for the productivity and success of any organization. Surprisingly, 60% of companies lack a long-term internal communication strategy, which p...


Businesses thrive on communication for efficiency, productivity and accomplishment. When the right information is passed from the right designation in the organization, it promotes positivity an...
Categories
Blog
(3014)
Business Management
(380)
Employee Engagement
(225)
Digital Transformation
(194)
Growth
(144)
Intranets
(137)
Remote Work
(63)
Sales
(53)
Collaboration
(48)
Customer Experience
(30)
Culture
(30)
Project management
(29)
Knowledge Management
(28)
Leadership
(20)
Comparisons
(9)
News
(1)

Related Posts
: 10 Agencies for Sustainable Business Growth")
Did you know that over 68% of all online experiences begin with a search engine, and organic search drives more than 50% of website traffic for most businesses? For startups competing in crowded markets, this makes choosing the right search mar...

Generative AI has rapidly moved from trend to transformative force, reshaping industries across the board. But perhaps its most visible impact has been in the marketing world—streamlining everything from ad creation to email copywriting in seco...

Many businesses still rely on software that was built 10, 15, or even 20 years ago. At first glance, these systems may seem cost-effective because they are already paid for and deeply embedded into daily operations. However, beneath the s...
")
Artificial intelligence is everywhere right now. From employee communication platforms and HR software to project management tools and company knowledge bases, businesses are racing to add AI to their workplace technology stack. The promise is ...

Launching a startup is exciting, but it can also be expensive if you build the wrong product. That's why many founders choose to start with a Minimum Viable Product (MVP) before committing significant time and money to full-scale development. A...


Jill Romford
I am a digital nomad, lover of exploring new places and making friends.
I love to travel and I love the internet. I take pictures of my travels and share them on the internet using Instagram.
Traveler, entrepreneur, and community builder. I share my insights on digital marketing and social media while inspiring you to live your fullest life.
Ready to learn more? 👍
One platform to optimize, manage and track all of your teams. Your new digital workplace is a click away. 🚀
Free for 14 days, no credit card required.